Apricots - Preserving the Harvest

Nearly Apricot Season!

Apricots first started production in the US in about 1792. Apricots originated in China and gradually made it to the Mediterranean where they had great success. Spanish explorers introduced it to the new world and it is now a small, but important crop to the state of Washington. Washington State produces roughly 400,000 boxes each year, which pales in comparison to the million of boxes produced in California, but we are known for our quality fruit, brilliant color and large size. Washington apricots are shipped throughout Northern America and to a few other countries as well.

Washington Apricots are a great seasonal fruit and are delicious for cooking and eating fresh out of hand. The Washington apricot season extends from late June to early August.

Apricot Nutrition

Beta-Carotene
Beta-carotene, a member of the anti-oxidant family, is believed to play a critical role in fighting disease.  Apricots are a premium source of beta-carotene with just three fresh apricots containing about 30 percent of the recommended daily amount.

Vitamin A
The beta-carotene in apricots is converted to Vitamin A in the body.  This nutrient helps protect the eyes and keep the skin, hair, gums and various glands healthy.  It also helps build bones and teeth.  Plus, research shows that Vitamin A helps to fight infection by maintaining strong immunity.  For this reason, researchers are looking to apricots as a valuable source of beta-carotene’s healing power.  Note: beta-carotene is often called Vitamin A on food labels.

A Strong Anti-Oxidant Team
The unique mix of compounds found in apricots also makes this fruit a good choice for helping to fight heart disease. Along with beta-carotene, apricots contain the other powerful anti-oxidants, Vitamin C and lycopene. Combined, these compounds help protect against cancer, heart disease and stroke.

Getting Five-A-Day
Eating five servings of fruit and vegetables each day plays an important role in healthy living.  The compounds found in food work together to provide the best benefit for your body.  As such, apricots are a solid choice for keeping healthy and adding variety to the five-a-day quota.


Shopping & Storing Tips

• Look for plump, fairly firm fruit with an orange-yellow to orange color.
• Fully ripe fruit is soft to the touch, juicy and should be eaten as soon as possible.
• Keep apricots cool to prevent over ripening.  Store ripe apricots in the refrigerator where they may keep for up to a week.
• Place hard apricots in a paper bag and let ripen for a day or two.
• To freeze fresh apricots, simply half the fruit and place on baking sheet until frozen. Then pack in a plastic freezer bag.
• Avoid green fruit which will not ripen.
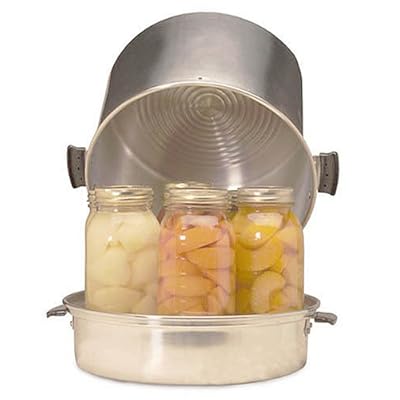


Canning Apricots

An average of 16 pounds is needed per canner load of 7 quarts; an average of 10 pounds is needed per canner load of 9 pints. A bushel weighs 50 pounds and yields 20 to 25 quarts-an average of 2¼ pounds per quart.

Select firm fruit slightly greener than would be ideal for eating fresh.

Wash fruit well. Cut prepared apricots in half, remove pits and slice if desired. To prevent darkening, keep peeled fruit in ascorbic acid solution. Prepare and boil a very light, light, or medium syrup or pack apricots in water, apple juice, or white grape juice.


Raw packs make poor quality apricots.

Hot pack – In a large saucepan place drained fruit in syrup, water, or juice and bring to boil. Fill jars with hot fruit and cooking liquid, leaving ½-inch headspace. Place halves in layers, cut side down. Process in a boiling water bath for 10 minutes. Shut off heat and let the pot rest for 5 minutes. Then, remove jars to cool.


Silky Apricot Butter

4 lbs apricots, peeled, halved and pitted
1 cup water
3 cups granulated sugar
4 tablespoons lemon juice 
  1. In a crockpot, combine apricots and water. Start with lid in place. Turn on high until mixture comes to a boil.. Prop up the lid on wooden spoons or chopstick to allow steam to escape, stirring occasionally, until apricots are soft and reduced, about 3-4 hours.
  2. Working in batches, transfer apricot mixture to a food mill or food processor fitted with a metal blade and puree just until a uniform texture is achieved. Do not liquify. Measure 12 cups of apricot puree.
  3. In the crock pot, combine apricot puree and sugar. Stir until sugar dissolves. Bring to a boil on high and cook until mixture thickens and holds its shape on a spoon. 
  4. Ladle hot butter into hot jars, leaving 1/4 inch headspace. Remove air bubbles, wipe rim and place lids.
  5. Process for in a Boiling Water Bath for 10 minutes. Turn heat off.  Wait 5 minutes then remove jars, cool and store.
Makes 6-7 Pints or 12-14 half-pints.

Mascat Apricot Dessert Topping

Use as a topping for pound cake, ice cream, frozen yogurt, etc.

1 1/2 pounds sliced fresh apricots
1/2 apricot nectar or orange juice

1 cup Muscat dessert wine

1 cup granulated sugar, mixed with
3 tablespoons ClearJel

Mix apricots and juice together and bring to a boil. Cook at a low simmer until apricots are soft. Add sugar+ClearJel and Muscat. Mix well and simmer for 1-2 minutes until thickened.

Pour into half-pint sized canning jars. Apply lids and process in a Boiling Water Bath for 15 minutes.

Makes 4-5 half-pints


Apricot Nectar

1 quart apricots
1/2 cup sugar
1 quart water
1 Tbsp. lemon juice

Wash and pit fresh fruit.  Boil fruit and water 5 minutes.   Strain.  Add sugar and lemon juice and bring to a boil.  Pour into pint canning jars, apply lids and process in a Boiling Water Bath for 15 minutes.

Makes 3 pints.


Pickled Apricots

A nice side dish for meat and poultry

7 lbs apricots(unpeeled, whole)
6 cinnamon sticks
4 cups sugar(may be all or part brown sugar)
whole cloves
1 tablespoon brandy per jar(optional)
2 cups vinegar

Wash apricots and stick 2-3 cloves into each one.  Boil cinnamon sticks and vinegar together.  Put apricots into syrup and boil gently for 5 minutes.   Pack into sterilized hot jars with one cinnamon stick in each jar and 1 tablespoon of brandy if desired. Pour in hot brine leaving 1/2 inch of headspace. Apply lids and process in a Boiling Water Bath for 10 minutes.

Apricot Jam with Grand Marnier

• 2.2 pounds apricots, pitted and halved
• 3 cups sugar
• juice of one lemon
• 1 cup honey
• 2 ounces(1/4 cup) Grand Marnier Liquor


Sterilize 6 half-pint jars and keep hot until ready to fill.


1. Place prepared fruit in a bowl, add lemon juice, honey and sugar. Cover and macerate for several hours in the refrigerator.
2. Transfer mixture to a heavy pot and slowly bring to a full boil.
3. Lower heat to a controlled boil, skim and continue to cook, stirring occasionally until mixture begins to reduce and thicken, and the apricot halves begin to break down.
4. When the jam has reduced almost to the jell point, add the wine. Cook a few minutes longer until ready.
5. Ladle into jars and seal. Process in boiling water for 5 minutes.


Apricot Relish

  • 2 pounds apricots
  • 2 cups onion, diced
  • 1 teaspoon salt
  • 5 cloves
  • 1 teaspoon cayenne pepper
  • 2 cups vinegar, white
  • 1 cup honey
  • 1 cup sugar
  • teaspoons tumeric
  • 1 teaspoon curry powder
  • 2 teaspoons ClearJel
  1. Wash apricots and remove stones.
  2. Place all ingredients except flour in a pot, bring to the boil, stirring,reduce heat and simmer 45 minutes. Stir occasionally.
  3. Blend ClearJel with a little water and stir into mixture. Bring back to the boil and simmer 5 more minutes.
  4. Ladle into hot jars and apply lids and Process in a Boiling Water Bath for 10 minutes.
  Apricot Wine

If you would like to learn more about Home Canning, join me for a canning class!


Cherries - Preserving the Harvest

Washington Cherry Season starts in June, so now is the time to brush up on everything we need to know about our wonderful, local cherry crop. First, Cherries are grouped into 2 types: Sweet Cherries and Sour Cherries. Most of the info on this page is going to be concerning the Sweet Cherries. Way down at the bottom, I have a couple of recipes for the Sour Cherries. Sour Cherries are not typically available in markets, but if you look carefully, you may spot Sour Cherry trees around your neighborhood! Sour Cherries are the ones that grow the best in the Seattle area and many people have planted them as ornamentals. Be nice and ASK FIRST before picking fruit off someone's tree! Sour cherries should be visible and ripe by mid-to-late June. Only pick the very red ones and come back a few days later and pick again. Green cherries are not much good--they are super sour and bitter.

 All cherries are HEALTHY! They are a rich source of potassium, melatonin, antioxidants, and a serving of a full cup of cherries has less than 100 calories.

Cherries are mostly local. The Northwest Cherry Season lasts from the first week of June until the end of August. Cherries are one of the freshest produce items available. Ripened on the tree, cherries are generally harvested, packed and on the shelf of your favorite retailer within 2 days. Growing regions scattered throughout Washington, Oregon, Idaho, Utah, and Montana offer small differences in microclimate which allow cherries throughout the region to ripen at different times through the season. This ensures that all summer long, the Northwest Cherries that you enjoy are never more than a few days from the tree.

Cherries come in different varieties.  Bing and Rainier cherries are the most common in our local markets but keep your eyes open and you may find Chelan, Tieton, Lapins, Skeena or Sweethearts in the market.

Or, skip the market and go right to the farm and PICK YOUR OWN!  This is a great family activity. Parents save a few bucks off the cost of organic cherries and kids get to learn where food comes from. U-Pick farms are a win-win-win! Find a good list of U-Pick Farms right here.  The U-Pick idea is not limited to cherries!  Our local farmers offer dozens of fruits, vegetables, herbs and flowers just waiting for you to come by and harvest them!  You can't get any fresher than U-Pick! (Can you tell I am a big fan?)

HOW MANY CHERRIES?
Yield. A lug(full box) weighs 25 pounds and yields 8 to 12 quarts. An average of 17 1/2 pounds makes a 7 quart canner load (approx. 2 1/2 pounds per quart); 11 pounds makes 9 pints. An average of 1 3/8 pounds makes 1 pint of frozen cherries.


THE RIGHT TOOL FOR THE JOB
Cherries are "stone fruit" which means they have pits that make them tricky to eat and cook with. Get the right tool for the job--a Cherry Stoner. This gadget only costs a few bucks and will save you about $1,000 worth of frustration!.

KEEPING FRESH
Fresh cherries are very perishable! Leave the stems on, they help keep the juice in, Keep cherries uncovered in the coolest part of the refrigerator and they will last up to 10 days. Of course, an open container of cherries makes them a very easy snack, so don't expect any of them to actually stay in the fridge that long!

DRYING
Wash fruit. Cut in half and remove pits. Cherries can be dried safely without any pretreatment, but pretreating may preserve the natural color and speed drying.

To pretreat: Ascorbic acid, available at drug stores, may be used. Prepare a solution of 1 to 2 1/2 teaspoons of pure ascorbic acid crystals to 1 quart cold water. Vitamin C tablets can be crushed and used (six 500 milligram tablets equal 1 teaspoon ascorbic acid). One cup treats about 5 quarts of cut cherries. Dip cut cherries in ascorbic acid solution. Soak for a few minutes, remove with a slotted spoon and drain well. Commercial antioxidant mixtures are not as concentrated as ascorbic acid but are more readily available in grocery stores.

Arrange fruit on drying trays in single layers, pit cavity up. Cherries will dry in 24 to 36 hours in a dehydrator, in the sun from 12 hours to four or five days, and in the oven from six to 24 hours. Properly dried cherries are leathery and shriveled.

FRUIT LEATHER
Select ripe or slightly overripe fruit. Wash, pit, and drain well. Puree cherries in blender. Sweetener may be added in the form of honey, or sugar. Honey is best for long storage because it doesn’t crystallize. Sugar is good for immediate use or short storage. Sweeten to taste.  Bring cherry puree to a boil. Line a plate or cookie sheet with edges with plastic wrap. Smooth out the wrinkles. Pour the pureed fruit onto the cookie sheet in a 1/4 inch thick layer. Spread evenly.
  • To dry in an oven- Place the tray on the center rack in an oven at lowest setting and prop oven door slightly open. Approximate drying time may be up to 18 hours.
  • To dry in a dehydrator- Use specially designed dehydrator trays or plastic trays. Line with plastic wrap. Pour pureed fruit on the trays in a 1/8 inch thick layer. Spread evenly. Approximate drying time is 6-8 hours.
  • Leather that is dry can be easily pulled from the plastic wrap. Fruit leather can be left on plastic or pulled from plastic wrap while still warm. Cool and re-wrap in plastic if needed.
Dried cherries and cherry fruit leather should be used within 1-2 years.

FREEZING
There are several ways to pack cherries for freezing. The best method selected will depend on how you want to use the frozen product.
  • Sugar pack. Mix 2/3 cup sugar per quart of sour cherries; or 1/3 cup sugar per quart of sweet cherries. To package, fill freezer containers to within 1/2 inch from top. If pint or quart freezer bags are used, fill to within 3/4 inches from the top. Squeeze out as much air as possible. Seal and label.
  • Unsweetened pack. Without liquid or sweetening, pack cherries into containers to within 1/2 inch from top. If pint or quart freezer bags are used, fill to within 3/4 inches from the top. Squeeze out as much air as possible. Seal and label. The fruit may be sweetened at the time of serving.
  • Loose cherry pack. Spread whole sweet cherries in a single layer on shallow trays or cookie sheets and freeze. Remove and quickly package in labeled freezer bags or containers removing as much air as possible from containers. Seal and return promptly to freezer.
  • Syrup pack. A light syrup is recommended for sweet cherries and medium syrup for sour cherries. Allow 1/2 to 2/3 cup of syrup for each pint of fruit.

Frozen cherries should be used within 1 year.

CANNING
Note the clever use of Tattler Re-Usable Lids!
Wash jars. Prepare lids according to manufacturer’s directions.

Prepare sugar syrup, if needed:
  • Sugar Syrup Recipes
  • Light: 1.5 cups sugar to 5.75 cups water
  • Medium: 2.25 cups sugar to 5.25 cups water (recommended for sweet cherries)
  • Heavy: 3.25 cups sugar to 5 cups water (recommended for Sour Cherries)

Stem and wash cherries. Remove pits if desired. If pitted, place cherries in water containing ascorbic acid to present stem-end discoloration (1 teaspoon of ascorbic acid or 3 grams in 1 gallon water). If canned unpitted, pricking skins on opposite sides with a clean needle will prevent splitting. Cherries may be canned in water, apple juice, white grape juice, or syrup. If syrup is desired, select and prepare preferred type as directed above. Medium syrup works well for sweet cherries and heavy syrup for sour cherries.
   Hot pack– In a large saucepan add 1/2 cup water, juice, or syrup for each quart of drained fruit and bring to a boil. Fill sterilized jars with cherries and cooking liquid, leaving 1/2" headspace. Wipe the sealing edge of the jar with a clean, damp paper towel. Adjust lids. Process in a Boiling Water Bath: 10 Minutes for pint jars or 15 minutes for quart jars. Turn off heat at the end of processing and allow the kettle to sit for an additional 5 minutes before removing jars.
   Raw pack– Add 1/2 cup hot water, juice, or syrup to each jar. Fill jars with drained cherries, shaking them down gently as filled. Add more hot liquid, leaving 1/2" headspace. Wipe the sealing edge of the jar with a clean, damp paper towel. Adjust lids.  Process in a Boiling Water Bath: 20 Minutes for pint jars or quart jars. Turn off heat at the end of processing and allow the kettle to sit for an additional 5 minutes before removing jars.

Canned cherries should be used within 18 months.

SWEET CHERRY PIE FILLING
This thickened cherry product is great for a lot more than pies!
  • Stir a couple of tablespoons into yogurt
  • Add to milk or kifir to make a smoothy
  • Spoon over ice cream
  • Add to homemade cheesecake
  • use as a topping for pound cake
  • make cherry shortcake(instead of strawberry shortcake)
Makes 1 quart -- Recipe may be multiplied as needed
  • 3.3 cups of fresh or frozen sweet cherries
  • 1/2 cup granulated sugar (If using Sour Cherries, increase sugar to 1 cup.)
  • 1/4 cup + 1 teaspoon ClearJel® Corn Starch
  • Cold water 1-1/3 cups
  • 4 teaspoons lemon juice
  • 1/8th teaspoon cinnamon (optional)
  • 1/4 teaspoon almond extract(traditional but optional)
  • 6 drops red food coloring(optional)

Rinse and pit fresh cherries, and hold in cold water. To prevent stem end browning, use ascorbic acid solution. For fresh fruit, place in 3.5 cup batches into 1/2 gallon boiling water. Boil each batch 1 minute after the water returns to a boil. Drain but keep heated in a covered bowl or pot. Combine sugar and Clear Jel in a large saucepan and add water. If desired, add cinnamon, almond extract, and food coloring. Stir mixture and cook over medium high heat until mixture thickens and begins to bubble. Add lemon juice and boil 1 minute, stirring constantly. Fold in drained cherries immediately and fill jars with mixture without delay, leaving 1 inch headspace. This will fill 1 quart jar or 2 pint jars, or 4 half-pint jars. Adjust lids and process immediately. Processing time in a Boiling Water Bath is 25 minutes, plus 5 minutes of rest in the hot water before removing the jars.

Note: ClearJel® Corn Starch is the only type of starch thickener that may be used in home canning. It is available online or at Goods For The Planet in Seattle.

Cherry Juice
4 quarts (4 pounds) cherries
Water
3 to 3 1/2 cups granulated sugar

Bring cherries and 4 quarts water to a simmer in a large pot. DO NOT BOIL. Simmer 5 minutes, or until most cherries burst. Pour berries and juice into damp jelly bag or a colander lined with four layers of clean cheesecloth. Let juice drip into a large bowl. DO NOT squeeze the bag. When you have extracted as much juice as possible from the pulp, return pulp to pot with 2 quarts water. Simmer 2 minutes. Pour this pulp and juice through jelly bag again to extract remaining juice. Place the 2 batches of juice in a large pot. Add sugar to suit your taste and 1 more quart water. Heat to dissolve sugar completely, but do not boil. Quickly pour into clean, hot jars, leaving 1/2-inch headspace; seal. Process in Boiling Water Bath for 15 minutes.

Yields 6 to 7 quarts.

Chilli Cherry Sauce
Great as a sauce for roasted pork as well as a topper for morning toast!
1 pound cherries, pitted
2 tsp freshly grated ginger
2 small red chillies, finely chopped
2 tbsp. lemon juice
1/4 tsp. ground allspice
1 tsp. ground cinnamon
1 cup raw sugar

Place all ingredients in a saucepan and gently simmer for 1/2 hour. Take off the heat and mash with a potato masher. Set back on heat and simmer for another15 minutes, stirring constantly.

Note: This sauce can be bottled and kept in the refrigerator for 4 weeks.

To can - pour boiled sauce into sterilized pint or half-pint jars leaving 1/2 headspace. Adjust lids and process in a Boiling Water Bath for 10 minutes. Be sure to label before tucking this away in the pantry.

Homemade Maraschino Cherries
These frighteningly red cherries are super sweet and slightly salty.
  • 5 pounds cherries, pitted
  • 10 cups water
  • 1 tbls salt
  • 1 tsp alum
  • 10 cups white sugar
  • 3 cups water
  • juice of one lemon
  • 2 tbls red food coloring
  • 2 tbls almond extract

Bring water, alum and salt to a boil. Add cherries and soak overnight .

The next morning, drain the cherries and rinse in cold water.

Combine cherries, water, sugar, lemon juice, and red coloring. Heat to boiling point. Let stand for 24 hours.

Remove the cherries and again boil the juices. Pour over the cherries and let stand for another 24 hours. Bring to boil again.

Remove the cherries again and boil the juices. Add almond extract. Pack cherries into sterilized jars  and fill the jars with juice, leaving 1/2 inch headspace. Apply lids and process in a Boiling Water Bath for 10 minutes.


Brandied Sweet Cherries
  • 3 pounds cherries, pitted
  • 2 cups sugar
  • brandy
Combine the cherries and sugar in a large saucepan. Let stand for 2 hours. Cover and cook over low heat 25 minutes, stirring often. Remove the cherries from the syrup. Bring the syrup back to a boil and simmer, uncovered, for 10 minutes.

Measure the syrup and add 1/3 cup brandy for each cup of syrup. In the saucepan combine the syrup and the cherries. Bring to the boil. Spoon into hot jars leaving 1/2 inch space at the top before placing the lids on. Place in a Boiling Water Bath for 30 minute.

Store for at least 2 months before serving.

Cherry Balsamic Sauce
Serve with grilled meat, poultry, or fish.  
  • 1 cup balsamic vinegar
  • 2 tablespoons olive oil
  • 1/2 cup pitted and chopped  sweet cherries
  • 1 tablespoon Dijon-style mustard
  • 1 tablespoon sugar
  • 2 teaspoons chopped fresh sage
  • 1 teaspoon each chopped fresh rosemary and thyme
  • 1/2 teaspoon salt
  • 1/8 teaspoon ground pepper
  • 1/2 cup pitted and halved  sweet cherries

Mix vinegar and olive oil; reduce mixture to 1/2 cup.  Add chopped cherries, mustard, sugar, herbs, salt, and pepper; simmer 10 minutes.  Reserve half of sauce for marinade.  Add halved cherries to remaining sauce; return mixture to a boil and simmer about 1 minute.  Pour into sterilized half-pint or pint jars. Apply lids and process in a Boiling Water Bath for 5 minutes.

Cherry Cordial
  • 3 cups fresh cherries, pitted
  • 1/2 cup granulated sugar
  • 2 cups honey
  • 2 cups vodka
  • 1/2 cup brandy
Coarsely chop the cherries in a food processor fitted with the metal blade, or chop with a knife. Stir the cherries and sugar in a large bowl until the cherries are well coated. Stir in the remaining ingredients until blended. Pour the mixture into a large glass jar, cover, and store in a cool, dark place for at least 1 month, stirring or shaking the jar every few days.

Before serving, strain the liquid from the cranberries through a fine strainer or dampened cheesecloth. It may be stored tightly covered at room temperature for up to 3 months. Refrigerate it for longer storage. Makes about 4 cups.

Canning Basics: Jarology

While canning lids come in just 2 sizes, standard and wide mouth, canning jars come in many different shapes and sizes which leads to the question, "Why so many jars?"

And the answer is, different foods like different jars.

Breaking jars into the two main categories and discussing by size, here are my recommendations for what jars to use for what applications.

Standard Mouth Jars. 


These jars take the smaller of the two lid sizes and are usually straight sided until the 16 ounce size which has "shoulders". The replacement lids and rings are slightly lower in price so over the long run, it is cheaper to can in the standard mouth jars.

2 ounce--Great for powerful goodies like Bacon Jam or Plum Marinade. Also good for dry spice rubs and other special seasonings.

4 ounce--For Jams, Jellies, Marinades, Hot Sauces and Salsas.

8 ounce(half-pint)--Jams, Jellies, Salsas, Fruit Butters, Relish, Tomato Paste, Pizza Sauce and single servings of fruit(to pack in lunches).

12 ounce Quilted Crystal--Jams and Jellies, Pickled Asparagus, Pickled Beans and other pickles prepared in long slim sticks.

16 ounce(pint)--Usually this is the smallest size of jar that has "shoulders" which are useful to help hold fruits and vegetables, that might tend to float, under the level of the liquid. Use these jars for apricot halves, plum halves, tiny pickled whole peppers, brandied fruits, spiced apples, tomato sauce, fruit spreads for larger families.

32 ounce(quart) --Whole & Chopped Fruits, apple sauce, dill pickles, fruit juices and fruit juice concentrates, pie filling.

Wide Mouth Jars. 
These jars take the larger of the two lid sizes. The lids for these jars are slightly more expensive but these jars are easier to fill without making a mess and are very desirable in cases where food is to be "arranged" as it is put into the jars. Also in most cases, wide mouth jars are as comfortable in the freezer as they are in the pantry and can be used as a replacement for plastic containers.


8 ounce(Freezer-Safe)-- Frozen Soups, Canned Relish and Sauces.

16 ounce(Freezer-Safe) Thick Sauces, like Apple Butter, that will be spread with a butter knife. Frozen Soup for 2 people.

32 ounce-- Whole & Chopped Tomatoes, Pickles.

64 ounce(half-gallon) Fruit Juices, Fermenting, Dry Goods Storage.


Special Jars
These, rather expensive, jars are great for gift-giving.


"Elite Platinum" 4 ounce(half-pint)-- Dipping Sauce, Pesto, Jams & Jellies to be given as gifts.

"Elite Platinum" 8 ounce(pint)--Hostess Gifts of Homemade Pickles & Sauces.

Fancy Pantry: Bloody Mary Supplies

One Quart of Bloody Mary Mix*:

Prepare tomato juice-
3 Pounds of red ripe tomatoes, stewed and strained through a fine sieve to make 4 cups of tomato juice

Measure the following into a clean 1 quart canning jar:
  • 3 tablespoons lemon juice
  • 3 tablespoons lime juice
  • 1 tablespoon prepared horseradish
  • 1 tablespoon Worcestershire Sauce, or to taste
  • 1 teaspoon minced garlic
  • 3/4 teaspoon hot sauce, or to taste (Make and use your own!)
  • 1 teaspoons salt (or to taste)
  • 1 teaspoon celery salt
  • 1/2 teaspoon freshly ground black pepper
 Fill jar with prepared tomato juice, leaving 1/2 inch headspace. Process jar in a Boiling Water Bath for 35 minutes.

Note: Horseradish loses it's heat over time so use this mix within a month or so. * Recipe adapted from Emeril's Bloody Mary Mix

Bloody Mary Pickle Mix
Into a 12 Ounce Quilted Jar:
  • 10 green beans, cut to fit
  • 4-6 small cauliflower florets
  • 2 cloves of garlic
  • 1 jalapeno pepper, cut into rings
  • 1 teaspoon of white or brown sugar
  • 1 teaspoon dill seed or dill weed
  • 1/4 teaspoon salt
Fill jar half full of vinegar(5% acidity) top up with clean tap water, leaving 1/2 inch headspace. Process in a Boiling Water Bath for 10 minutes.

Bloody Marys

When ready to serve, fill each glass with ice.

Add 1 ounce of vodka to each glass, then fill the glass with Bloody Mary Mix. Stir well and garnish with pickled green beans, and skewered cauliflower & jalapenos. Add other garnish as desired and call it a Liquid Salad!

Steam Canners -Still Not Recommended!

Steam canners are rather obscure in the US--they have been mostly replaced by the more highly-researched Boiling Water Bath Method. The basic idea is to process jars of food in live steam rather than immersing the jars in boiling water. This method is ONLY for high-acid foods.

If you insist on using this equipment for canning, follow these rules to the letter:
  • 1. Place appropriate amount of water in the base. Place the perforated cover over the base and bring water to a low boil.
  • 2. Pack and fill jars. Secure lids firmly, but not over-tight. Set each full jar on the base and allow it to warm up while packing and filling enough jars for one batch.
  • 3. When the last full jar has warmed up for 1-2 minutes, place the dome on the base and slowly (4-5 minutes)  increase temperature setting of the stove until a column of steam 8-10 inches is evident from the small holes at the base of the dome.
  • 4. Begin timing the process, maintaining the column of steam following the water bath canning recommendations adjusted for your altitude. Do not reduce temperature setting of the stove. The dome should not bounce from the base during processing.5. When processing time is complete, turn off the stove and wait 2-3 minutes before removing the dome. Remove the dome by turning it away from your face and body to avoid burns.
  • 6. Allow jars to cool and seal. Remove metal bands and store the jars in a cool dark place.
Extension researchers firmly advise against steam canning low acid (e.g., vegetables) or borderline acid foods (e.g., tomatoes). Under-processing these foods can lead to botulism food poisoning.


Taste of Spring

I seen kumquats at my local produce stand! This tiny member of the citrus family is a treat anytime, but you will only find them in the early spring.

Kumquat Chutney
This goes well with chicken, pork, lamb, and curry.
  • 6 navel oranges
  • 12 fresh kumquats or 1 (10 ounce) jar preserved kumquats
  • 1 red bell pepper, seeded and chopped
  • 1 green bell pepper, seeded and chopped
  • 1 onion, chopped
  • 1 cup raisins
  • 2 cups cider vinegar
  • 2 cups packed brown sugar
  • 2 cinnamon sticks
  • 6 whole cloves
  • 2 tablespoons finely chopped fresh ginger
  • 1/2 teaspoon cayenne pepper, or to taste
  • Salt and freshly−ground pepper, to taste
Cut the unpeeled oranges into 1/4−inch slices, and cut the slices into 6 or 8 pieces. Cut the kumquats into 1/4−inch slices. Combine all the ingredients in a large saucepan and bring to a boil over moderate heat, stirring frequently. Reduce the heat and simmer uncovered for 1 hour, stirring occasionally. Scoop out the cinnamon sticks and whole cloves, after cooking.

Ladle into sterilized jars and seal.Process in a Boiling Water Bath for 5 minutes. Will keep unprocessed refrigerated for up to 4 weeks. Makes about 5 cups or 5 1/2 pint jars.

Preserved Kumquats - Middle Eastern Style (found on Redacted Recipes)
The Middle Eastern and North African tradition of preserving lemons in salt results in an explosively strong and distinctive condiment for seasoning food. They are integral to many, many dishes-- fragrant tagines, marinades and all sorts of salads. The rinsed rind can be chopped finely and mixed with olives for an instant treat and a little preserved lemon pulp and rind adds a huge amount of flavor to any fish dish.

  • 2 one-pint containers of kumquats--scrubbed
  • Sea salt
  • Fresh lemon juice, as needed (about 6 lemons)

Pat the kumquats dry and cut off the stem ends. Make a single vertical cut 3/4 of the way through each kumquat. Fill each cut with as much salt as it will hold and place them into a sterilized wide-mouth quart glass jar. Compress them into the jar until no space is left and add lemon juice to cover. Seal and set aside. Do not refrigerate.

The kumquats will be ready to use when the rinds are tender, in about 2 to 3 weeks.

Refrigerate after opening.


Pickled Asparagus
Skinny, new asparagus are beginning to show up in markets--stock up on this treat!
  • 7 lbs asparagus
  • 7 large garlic cloves
  • 3 cups water
  • 3 cups white distilled vinegar (5%)
  • 7 small hot peppers (optional)
  • 1/3 cup canning salt
  • 2 tsp dill seed

7 "Quilted" 12 ounce jars(these taller jars make for prettier finished product.)

Wash asparagus well, but gently, under running water. Cut stems from the bottom
to leave spears with tips that fit into the canning jar, leaving a little more than 1/2-inch headspace. Peel and wash garlic cloves. Place a garlic clove at the bottom of each jar, and tightly pack asparagus into hot jars with the blunt ends down. In an 8-quart saucepot, combine water, vinegar, hot peppers (optional), salt and dill seed. Bring to a boil. Place one hot pepper (if used) in each jar over asparagus spears. Pour boiling hot pickling brine over spears, leaving 1/2-inch headspace. Remove air bubbles and adjust headspace if needed.

Wipe rims of jars with a dampened clean paper towel. Adjust lids and process in a Boiling Water Bath for 10 minutes.

Since the asparagus is cut to fit the jars in Fancy Style, there is a little waste in this recipe. Snap those cut pieces and use the tender parts to try this less-well-known recipe.

The "Other" Pickled Asparagus
  • Remaining Asparagus from recipe above
  • or 1 pound asparagus, snap off the bottom part and cut into 2 inch pieces
  • 1 small organic lemon(or 4 Kumquats), cut into very thin slices
  • 1/4 teaspoon caraway seeds
  • 1/4 teaspoon dried thyme
  • 1 teaspoon pickling salt
  • 1 tablespoon white or brown sugar
  • 5% acidity vinegar(about 1/2 cup)
  • clean tap water(about 1/2 cup)
In a small bowl, toss asparagus pieces, lemon slices, slat, sugar and spices together and then stuff the mixture into a pint (16 ounce) jar. Fill jar half-way with 5% vinegar. Then top off with clean water, leaving at least 1/2 inch headspace. Apply cap and process in a Boiling Water Bath for 10 minutes.

Want to learn more about Homemade Pickles? Come to Pickle Class!

Fancy Pantry 101: Flavored Oils, Vinegars and Syrups

Thoughtful gifts and useful products you can make in your kitchen: Flavored Oils, Vinegars, and Syrups bring an extra depth to home cooking!

This upcoming class will discuss and prepare 3 different products and give the tips necessary for safe home preparation.

Part 1) Flavored Oils. The variations of flavored oils is amazing but the average cost of $10.00 per small bottle is off-putting and the horror stories of illnesses traced to homemade oils is pretty scary! You can safely make these products at home by learning the rules.

Part 2) Flavored Vinegars. Add some tang and flavor to your salads and other cooking with your own homemade flavors. Adjust the strength to exactly fit your preferences!

Part 3) Flavored Syrups. Learn how to make flavored syrups and spice up the sweets on your menu!

This is a HANDS-ON CLASS. Each Participant will prepare products in class and take home a booklet of recipes and 3 bottles of products.

Where: Goods For The Planet, 525 Dexter Ave N Seattle, WA 98109

Bring: A hand towel or cloth shopping bag to transport your booty and your own fancy bottles, if desired.

Cost: $40 (Includes 3 bottles of products and a 40 page booklet of recipes.)

Class size: 8 people per session. No exceptions. Prepaid classes are valid for 1 year. If you find yourself unable to attend your assigned class, please email me to reschedule.

Class Dates(Click on desired session to Register and Pay):

UstaBees Recycled Goodies!

UstaBees Products available NOW!

Every UstaBee used to be something else and has been recycled and repurposed to extend its useful life. Check back and see what's new!


UstaBees Recycled
Nylon Produce Bags

  • Use in place of plastic produce bags
  • Jelly Straining Bag
  • Spice Bag
  • Sun Tea Bag
  • Can be used in most straining projects
    that call for cheese cloth

Lightweight
Machine Wash & Dry
Approx. 13"x13"
Drawstring Top


Set of 4 bags $14.99+$2.00 S&H


Welcome Grouponers!

Slideshow